Adding products to your inventory can be a tedious and time-consuming task, especially if you are dealing with large numbers of items. Fortunately, there is an efficient way to get the job done: using inventory file templates. By leveraging the power of these pre-made templates, you can quickly add hundreds or even thousands of products at once, saving yourself valuable time and effort in the process.
In this guide, we will explain exactly how to use inventory file templates to efficiently add new products to your store’s catalog. We will cover everything from what an inventory file template is and why it’s useful, all the way through creating one for yourself and uploading it into your system. Once you have mastered this method of product management, you will never want to go back! So let’s get started…
What Is An Inventory File Template On Amazon?
Many Amazon sellers may not be aware of the inventory file template, but it’s an incredibly useful tool that can save them valuable time. An inventory file template is just what it sounds like – a standard format into which all relevant information about your Amazon products and listings can be entered.
This template takes the hassle out of filing all these details – you simply plug in the relevant data such as product descriptions, pricing, and quantity available – and everything is streamlined into an easy-to-understand layout. With this comprehensive database of items at your fingertips, optimizing your inventory management becomes easier than ever before.
How To Add Products With An Inventory File Template
Adding products to your store with an inventory file template is simple and straightforward. Here are the steps you need to follow:
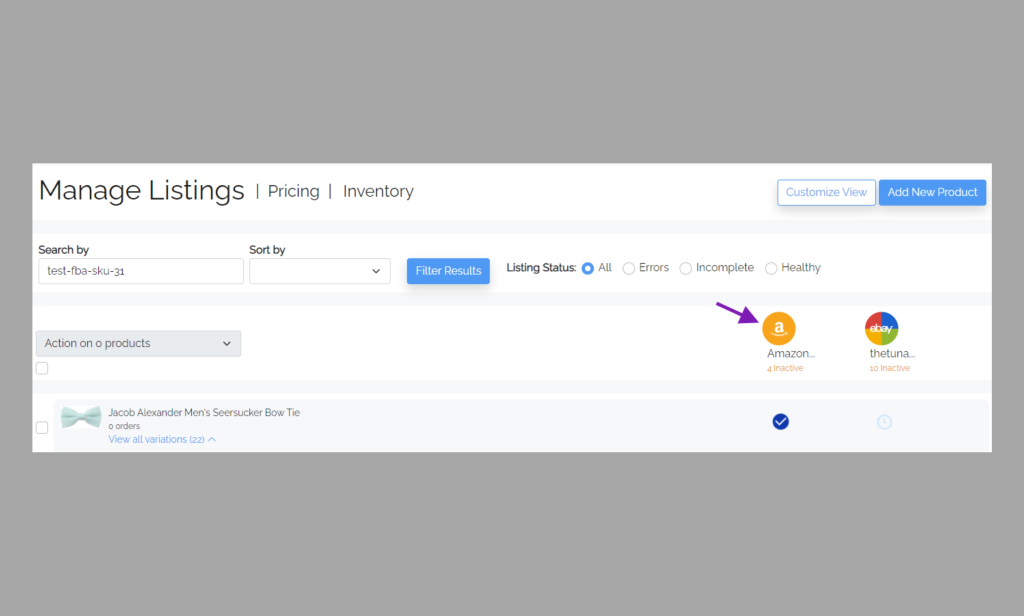
Step One: Manage Listings
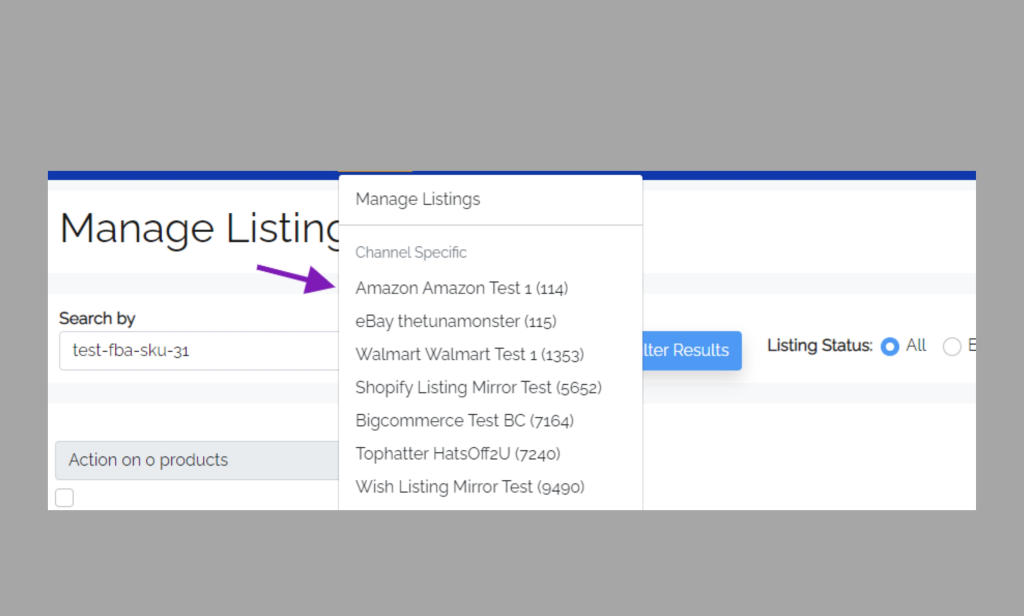
In order to add products using inventory file templates, the first step is to manage your listings. You can do this by creating a listing template, and setting up item specifics and storefront preferences. Listing templates enable you to quickly create multiple amazon listings that have the same information, reducing time spent on manually entering details for each product.
Item specifics are attributes such as color, size, and style that help customers find your items more easily. Finally, storefront preferences determine how you want to display details such as shipping information or payment methods.
Step Two: Prepare Inventory File Template
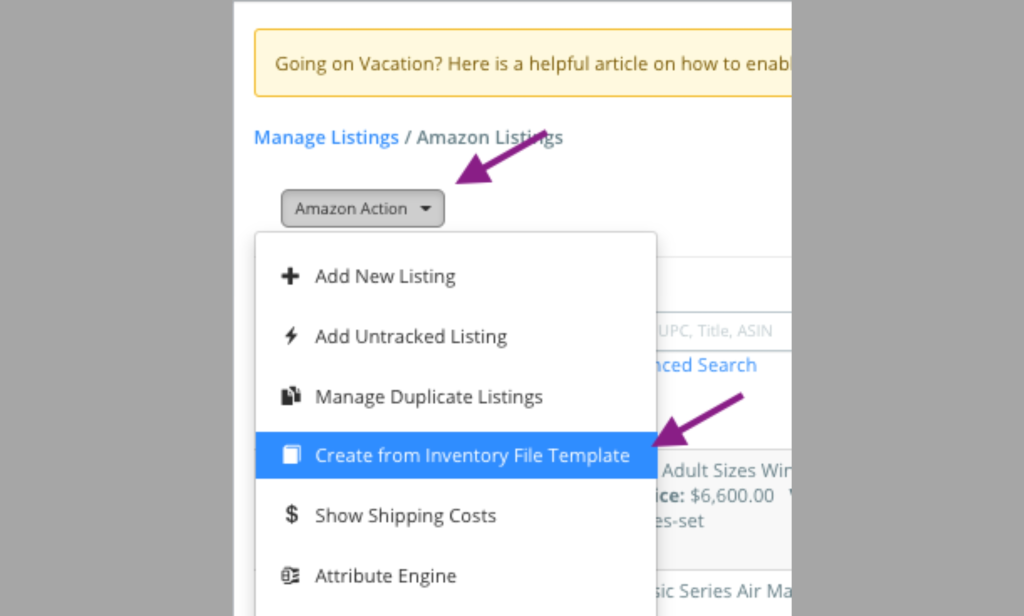
Once you have managed your listings, the next step is to prepare an inventory file template. This is a spreadsheet that contains all the product information you want to include in your listing. You can use an Excel file, a CSV (Comma Separated Values), or TSV (Tab Separated Values) format.
Make sure you fill out all the necessary fields such as title, description, price, and quantity before uploading it into your store. The Excel template provided by the platform you are using should have all the information required. CSV and TSV inventory files are slightly more complicated to create but will provide better formatting options.
Step Three: Upload The Inventory File Template
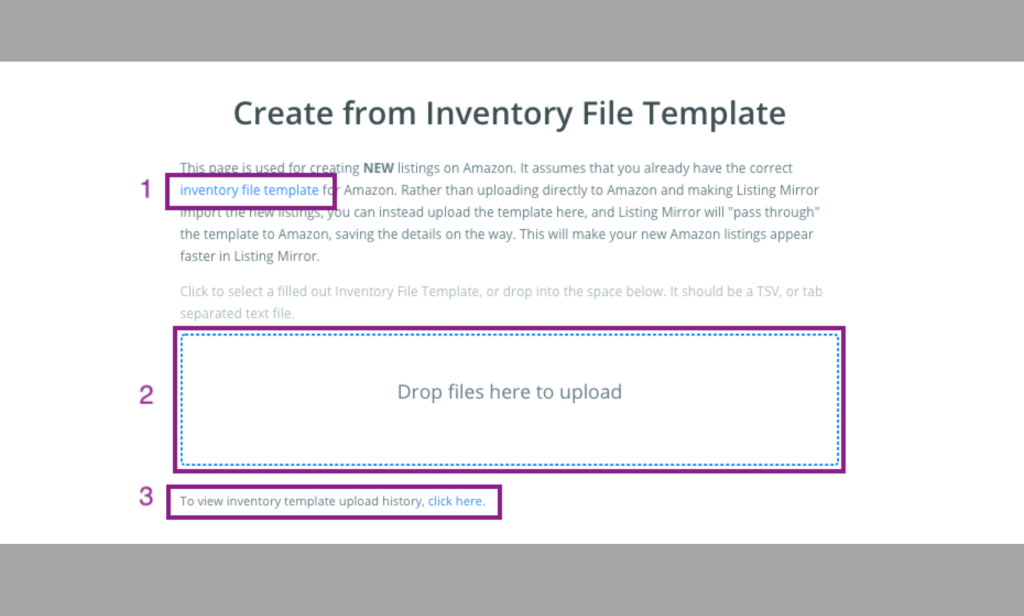
The next step is to upload it into your store. This can usually be done in a few clicks from your admin dashboard or using an API call if you are using third-party software to manage your store. You can also use FTP or SFTP (Secure File Transfer Protocol) if you prefer to use a more secure method.
Make sure that all the information entered in your inventory file template upload is accurate and complete before uploading it into your store.
Step Four: Review And Confirm
After your inventory file template is uploaded, review it to make sure all the information is accurate and complete. If there are any changes that need to be made, you can do so directly from the admin dashboard or using an API call if you are using third-party software. Once your inventory file template is confirmed, the products will be added to your store and visible to customers.
Step Five: Monitor

Finally, it is important to monitor your inventory file template and make any necessary changes whenever needed. This will ensure that your products are up-to-date and accurately represented in your store. The best way to do this is to set up automatic updates for your inventory file template.
An inventory file template is the quickest and most efficient way to add products to your store. Following these steps will help you get started with adding products through an inventory file template quickly and easily.
What Advantages Does An Inventory File Template Offer?
With the help of an inventory file template offers several advantages over manually adding products to your store. This section will cover some of the key benefits in detail.
1. Automated Upload

One of the main advantages of an inventory file template is the ability to upload your products in bulk. With an inventory file template, you can save time by quickly and easily uploading a large number of items into your system at once.
You simply need to format the data correctly, upload the file to your system, and voila – your products are ready to be sold! Automated upload makes it easy to keep your inventory up-to-date and accurate, so you can make sure that customers always have access to the products they’re looking for.
2. Get Organized
An inventory file template to upload your products will also help you keep your data organized and consistent. A key to seamlessly uploading your products is ensuring that each product has the correct category, subcategory, and attribute data. This ensures you accurately categorize your products on the platform and shoppers can find them easily.
It’s also important to think about how a shopper would search for a product when determining what attributes to include in your inventory file template. This will help shoppers find the product easier and convert them to a smooth shopping experience.
3. Save Time And Effort

Using inventory file templates to add products to your store can save you a significant amount of time and effort. Instead of having to manually enter each item into your system one at a time, you can simply upload the entire list in one go. This means no more tedious data entry and no worries about making mistakes or omissions.
Furthermore, because all the details are already included in the template, there’s no need for extra research or data-seeking. This makes adding a large number of products to your store much easier and faster. With this time-saving benefit, you can focus on other areas of your business that require attention.
4. Reusable Template
In addition to being able to quickly upload a large number of products, an inventory file template is also reusable. If you need to add more products or make changes to existing ones, simply update the data in your inventory file and reupload it. The variation theme and variation titles in each product listing will automatically update, ensuring that your inventory is always up-to-date and accurate.
This allows you to keep your product information up-to-date without having to start from scratch. The template also ensures that all products have the same attributes and categories, so you don’t have to worry about discrepancies between your products.
5. Easy-to-Understand Reporting
Using inventory file templates to add products into specific categories also makes it easy to understand the data. The template will allow you to quickly view what is in stock, and what has been sold and even compare sales over time of that product category.
This allows you to make informed decisions about stocking levels, pricing, and promotions based on actual sales data. It’s simple to review the information, as you’ll be able to see all of the data at once in a single report.
Plus, it’s easy to understand, so you won’t need to be an expert coder to make sense of the numbers. With inventory file templates, your business will have reliable and accurate reporting that can help you get ahead.
6. Cost-Effective

Finally, using inventory file templates is also a cost-effective option for adding products to your store. There are no additional costs involved and it’s much less time-consuming than manually adding each item. This makes it an ideal solution for businesses that need to get their products online quickly and efficiently without breaking the bank.
Inventory file templates make it easy to keep your store fully stocked and up-to-date. You can upload a large number of products in one go, organize the data correctly, and get accurate reporting – all without spending a fortune. With this cost-effective solution, you’ll be able to maximize sales and keep customers coming back for more!
How Do Inventory File Templates Compare To Manual Product Entry?
Now that you understand the exclusive benefits of using inventory file templates to add products, let’s compare it to the manual product entry process. Manual product entry requires you to manually enter each product into the system, one by one. This can be very time-consuming and tedious work, especially when dealing with a large number of products.
With inventory file templates, you can quickly and easily add dozens or even hundreds of products at once. All you have to do is upload your inventory file template and the system will automatically fill in all of the necessary information for you. This saves you time and effort, allowing you to focus on other important tasks like managing your inventory or marketing your products.
Another thing to consider is accuracy. If you’re manually entering product information, there’s always the risk of making a mistake that can cost you money in the long run. With inventory file templates, however, each entry is automatically checked for accuracy before it’s added to your system, ensuring that all of your products are correctly listed and accounted for.
The choice is clear – inventory file templates are the smart and efficient way to add products to your system. With just a few clicks, you can quickly and easily add dozens or even hundreds of products with accuracy and confidence. Save time, energy, and money by using inventory file templates today!
FAQs
How Do I Add Multiple Items To Amazon Seller Central?
Adding multiple items to Amazon Seller Central is a snap! The process takes a few minutes and requires only basic inventory data. To get started, head over to the “Manage Inventory” tab in your seller central dashboard. Once there, you can enter item descriptions, SKUs, price points, and other essential details for each product by selecting the “Add a Product” button.
Eventually, when all the necessary info has been inputted for each item, click the “Submit Your Products for Review” button to complete the process! Amazon integration is also available for more advanced users. So don’t delay – add your products to Amazon Seller Central today and start watching those sales roll in.
What Is The Best Way To Organize My Inventory?
The best way to organize your inventory of your seller central account is to create an inventory file template. This can be done by entering the item descriptions, SKUs, price points, and other essential details into a spreadsheet or accounting software.
Once completed, upload the data into your store’s system for easy access and reliable reporting. By keeping your inventory organized and up-to-date in this way, you’ll be able to maximize sales and keep customers coming back for more!
How Do I Make Sure My Inventory File Is Accurate?
The best way to ensure your inventory file is accurate is to double-check each field before submitting it. Make sure all the information is correct and up-to-date, including the product name, parent SKU, quantity, price, description, and any other relevant data points.
If you’re uploading a large inventory file with multiple products in it at once, be sure to review each entry carefully so that your customers will have accurate and up-to-date information when they make their purchases.
Furthermore, be sure to keep your inventory file updated as products come in and out of stock so that customers can easily find what they’re looking for without any confusion or frustration. The product ID should also be the same across all platforms so that customers can easily track their orders. Once you’ve double-checked the accuracy of your inventory file, simply upload it to your store and you’re all set.
The Bottom Line
At the end of the day, inventory file templates are an invaluable tool for any eCommerce business. This cost-effective solution allows you to quickly and easily add dozens or even hundreds of products with accuracy and confidence. Ready to get started? Be sure to follow the steps outlined here and use our helpful template as a guide.
But don’t forget to double-check your work – accuracy is key! With the right preparation and execution, you can add products with ease and keep your eCommerce business running smoothly.
Be sure to check out our other e-commerce guides.

