Adding products to Amazon can be an incredibly powerful way for businesses and entrepreneurs to increase their product visibility and reach a much larger audience. However, manually adding products to Amazon can be a daunting task if you’re not familiar with the process.
Thankfully, this step-by-step guide will provide some clarity on how to add your products manually so that you’ll have the best chance of success when it comes time to launch your product. We’ll go over everything from setting up your account and creating listings, all the way through optimizing those listings for maximum visibility. So let’s get started!
How To Manually Add Products To Amazon?
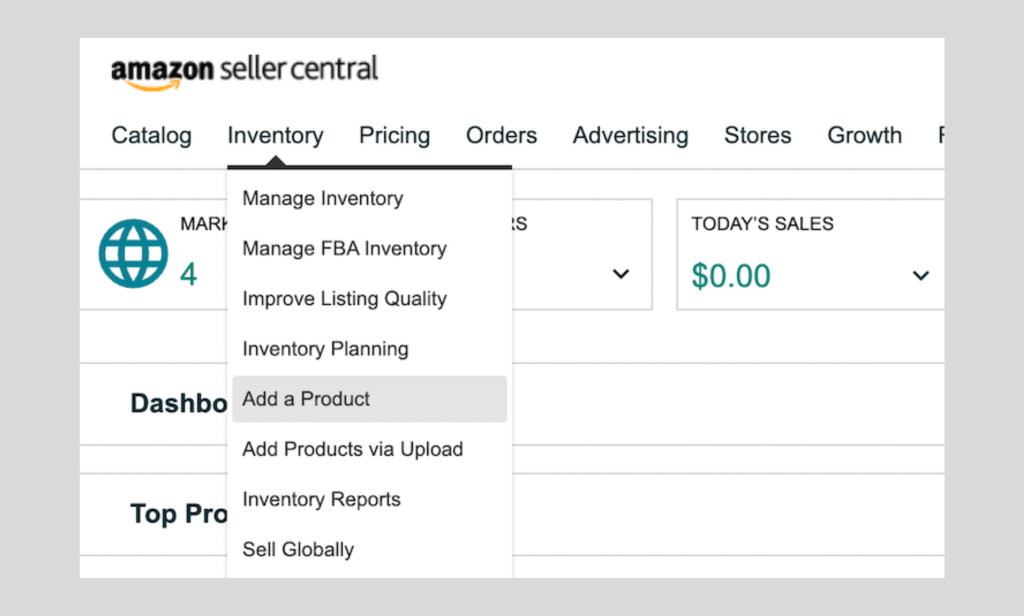
The first section of this guide will cover the process of manually adding products to Amazon. Here are the steps you need to follow:
Step One: Create A Seller Account
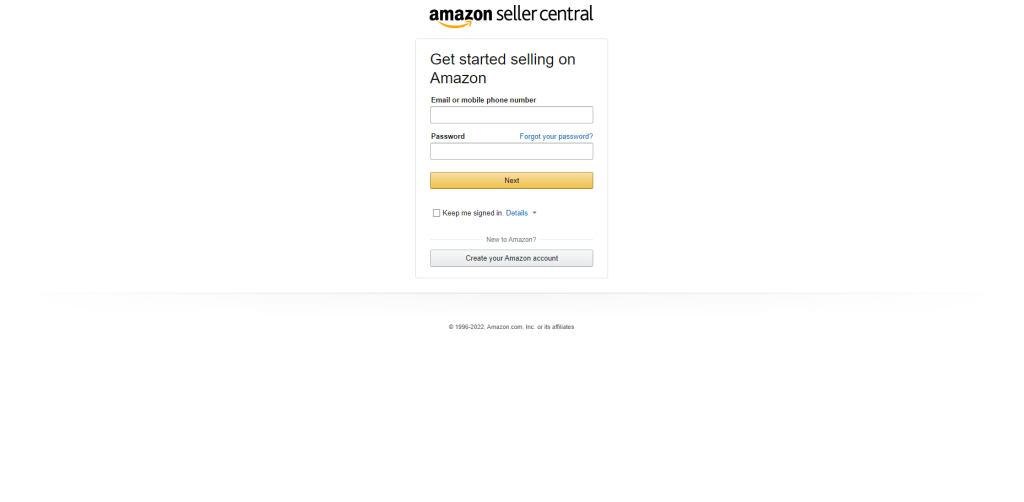
Creating a seller account on Amazon is relatively simple and straightforward. You will first have to provide your personal information, such as your name, address, and contact details. In addition, you will need to provide financial information, such as:
- Bank account: You will have to provide your bank account details, such as the name of the financial institution, account number, and routing number.
- Credit Card: You will also need to provide a valid credit card for payment processing purposes.
Once you have provided all of this information correctly, Amazon will review your application and approve it if everything is in order. Depending on the payment method chosen, you may also need to provide additional information. The final pace is to create an Amazon seller name and password. Once you have created your account, you can add products to the platform. The password you create will be used to access your account.
Step Two: Research Product Eligibility Standards
Before attempting to add any products to Amazon, it is important that you research the product eligibility standards set by the platform. For example, certain items may not be allowed to sell on Amazon, or have restrictions when it comes to listing them.
To make sure your products are eligible for sale and meet the proper requirements, check out the Amazon Seller Central page or speak to an Amazon seller representative who can help answer any questions you have.
There are several other important requirements to keep in mind when it comes to selling on Amazon, such as listing accuracy and copyright infringement guidelines. Be sure to do your due diligence before adding any products to the platform. It may also be beneficial to read up on Amazon’s pricing and listing guidelines, as well as any other rules or regulations that apply.
Step Three: Create A Product Listing
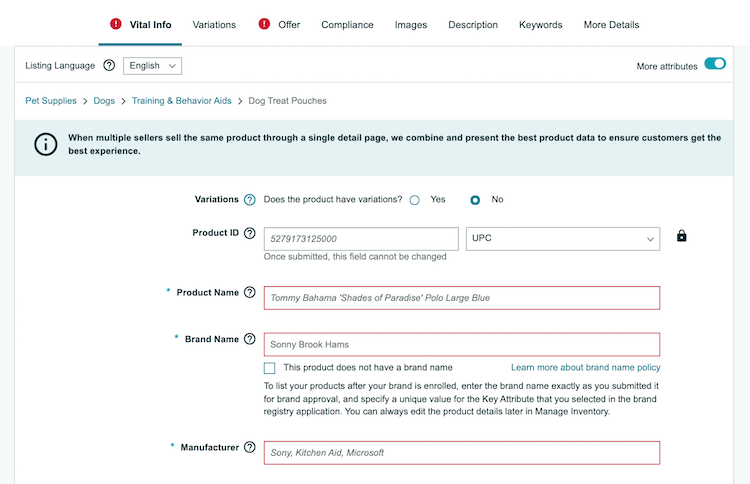
Once you have determined that the products you want to add are eligible for sale on Amazon, it’s time to start creating your private-label product listings. Each product will require its own unique listing page, with fields such as:
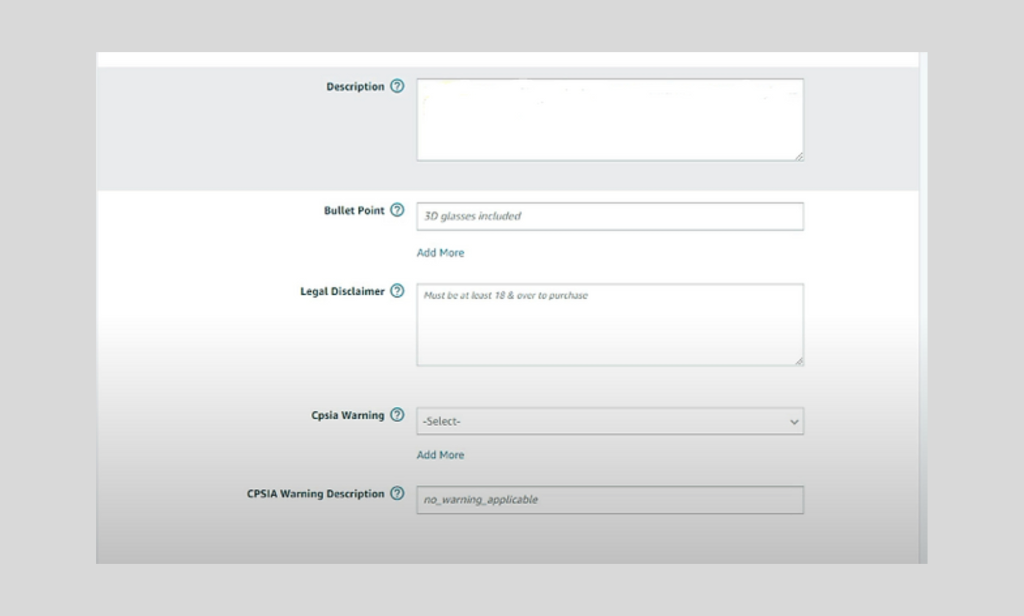
- Product title: This should accurately describe your product
- Product Description: This should provide a detailed description of the product’s features and benefits
- Product images: You will need to include several high-quality product images
- Price: The price you list must be equal to or lower than the prices found on other websites
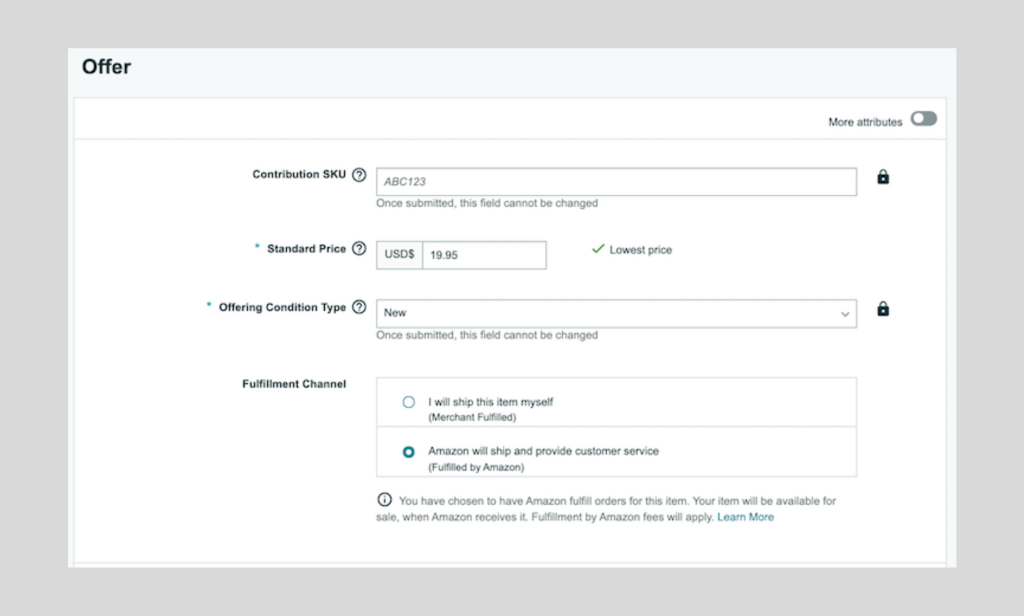
- Keywords: Include relevant keywords to help buyers find your product
- Product categories: Select the most appropriate product category for your product from Amazon’s list of available categories
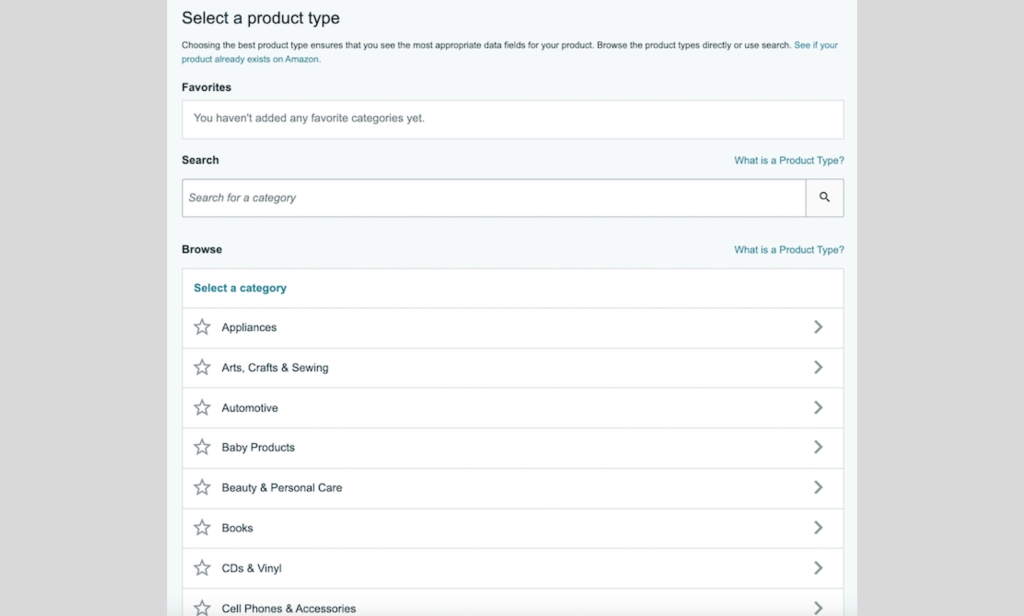
Make sure to include as much relevant detail as possible. For example, don’t forget to include size and color options if applicable. You will also need to provide product dimensions and weight information for shipping purposes. Include all of this information on the product listing page.
Step Four: Publish The Product Listing
Once you have completed the product listing, it’s time to publish it to Amazon. The process is relatively simple, as all you need to do is click the ‘publish’ button on your product amazon product detail page and wait for the approval. After the approval, your product’s brand-new listing will go live and start appearing in searches. But before you can start selling, you will need to complete the payment and shipping settings.
Amazon requires sellers to set up a payment method for buyers to pay for products purchased on the platform. The most popular payment methods used by Amazon sellers are direct deposit, PayPal, and credit cards. You should also provide detailed shipping information in order to ensure timely deliveries and customer satisfaction. Once you have all of this information set up, your products will be ready to start selling!
Step Five: Monitor Performance
Now that you have successfully added your products to Amazon, it’s time to monitor their performance. It is important to stay on top of customer reviews, as well as any changes in pricing or product features. By doing so, you can ensure that your products remain competitive and attractive to buyers because customers search for the best deals when shopping online.
Additionally, you should keep track of the number of orders and sales you get, as well as any return requests or refunds. This will help you understand how your products are performing in the marketplace and give you insight into what you may need to do to improve them. On the search bar of your Seller Central account, you can enter any item number and track its performance.
Monitoring your product performance is also important for staying one step ahead of the competition. Pay close attention to what competitors are doing and adjust your selling price and product features accordingly. Keep an eye out for new trends and stay up to date with the latest Amazon selling tips to ensure that your products remain successful on the platform.
Step Six: Promote And Advertise Products

After you have added your products and started monitoring their performance, you can begin to promote and advertise them. Amazon offers two types of advertising for sellers – sponsored product ads and product display ads.
- Sponsored product: This type of ad is displayed in the search results and on product pages when buyers are looking for a product similar to yours. Sponsored product ads appear more prominently than organic listings, so they can help you get more visibility for your products.
- Product display: Product display ads are shown on other websites that Amazon partners with and can help increase brand awareness or drive more sales. These ads can be targeted to specific audiences and buyers, making them a great way to reach potential customers.
By utilizing these types of ads, you can increase the visibility of your products and generate more sales on your Amazon seller central account. Some other methods to promote your products include creating coupon codes for discounts, offering free shipping on orders, and running social media campaigns. These methods can help you reach potential buyers and bring more exposure to your products.
Now that we have gone through the steps of manually adding products to Amazon, you can get started building your store and take advantage of all the opportunities that come with selling on the platform. With a bit of research, time, and effort, you can succeed in becoming an Amazon seller.
How Does Product Title Optimization Help To Boost Sales?
Manually adding products to Amazon is only part of the process. In order to maximize sales, you need to optimize your product titles in order to catch the attention of potential buyers. A well-crafted product title can make all the difference when it comes to visibility and sales.
Product title optimization involves includes a lot of attention to detail. This section will provide you with some tips to ensure that your product titles are optimized for success.
1. Use Keywords
When crafting your product titles, make sure to use relevant and targeted keywords. This helps buyers find your products more easily through search engines.
2. Keep It Short And Sweet
Keep your product titles concise and to the point. Avoid using overly complicated language or long sentences, as this can be confusing for buyers.
3. Use Descriptive Search Terms
Describe your products accurately with clear, unambiguous words that help buyers understand what they are looking at. For example, if you are selling a book, include the genre and author in the title.
4. Specific
Provide additional details that help buyers differentiate your product from others. For example, if you are selling a Bluetooth headset, include the model number in the title.
5. Include Branding
Include the brand name in your product titles for better recognition and to create a stronger bond with potential buyers. This will help boost sales.
By following these tips, you can ensure that your product titles are optimized and help drive more sales on Amazon. Optimizing your product titles is an important part of creating a successful store, as the fulfillment channel you use will depend on the titles you choose. So make sure to keep these tips in mind when adding products.
How To Optimize Product Images
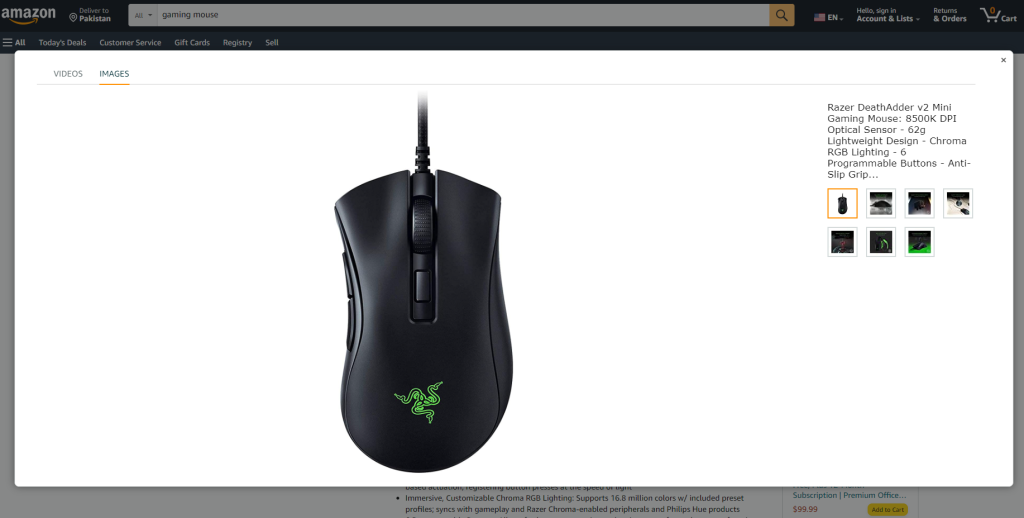
When adding products to Amazon, it’s important to also consider the product images. Product images are essential for potential buyers as they can provide an idea of what the product looks like and help them make an informed decision.
In order to optimize your product images before the bulk upload, here are some tips you should follow:
1. Use Professional Looking Images
Make sure that the images you use are of high quality and look professional. Avoid using blurry or low-quality photos, as this can give buyers a negative impression.
2. Utilize Different Angles
Showcase your product from different angles so that buyers can get an idea of what it looks like from all sides.
3. Include Zoom Features
Include zoom features so that buyers can get a closer look at your product and see the finer details.
4. Use White Backgrounds
Using a white background helps to make sure that the focus of the image is on the product, which makes it easier for buyers to view it.
5. Add Product Descriptions
Include product descriptions with each image so that buyers can know more about the item they are considering.
This is how to optimize product images for Amazon. By following these tips and utilizing high-quality images, you can boost the visibility of your products and drive more sales.
How To Optimize Product Descriptions
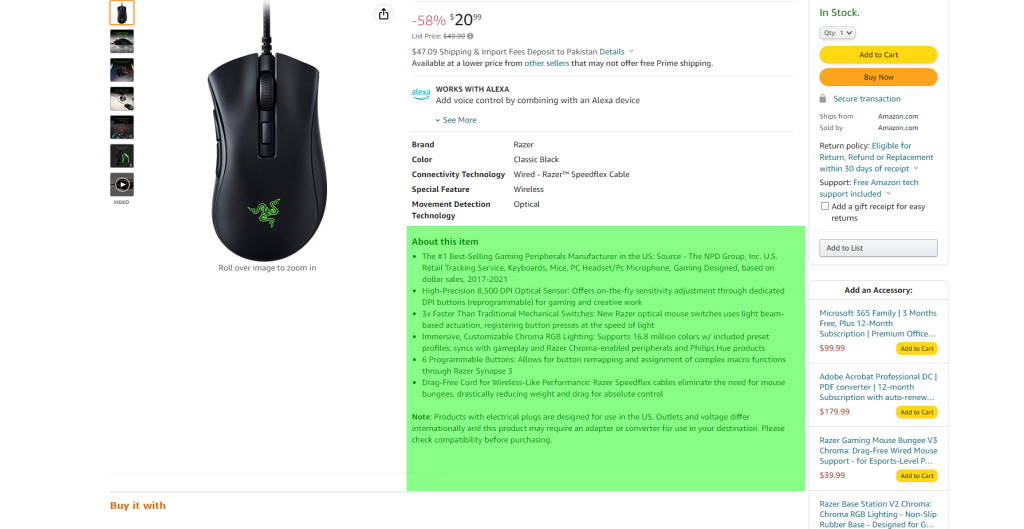
Now that you’ve added your products and optimized their titles and images, it’s time to focus on the product descriptions. Product descriptions are essential as they provide buyers with additional information about the item they are considering purchasing.
In order to optimize product descriptions there are several key elements to include.
1. Start With A Punch
Your product description should grab the reader’s attention right off the bat and make them want to learn more. This can be accomplished by building suspense, offering potential solutions/benefits, or providing an interesting factoid related to the product.
2. Include Details That Sell
In addition to the headline, include information that provides more details about the product. This could include features, dimensions, materials used, and other technical specifications. Highlighting these key pieces of information can help buyers make informed decisions quickly.
3. Include Customer Testimonials
Customer reviews are an important part of the buying process and can be a great way to showcase the value of your product. By including customer reviews in your product descriptions, you can provide potential buyers with an objective opinion that they can trust.
4. Focus On Benefits
In addition to providing key product features, focus on how these features will benefit potential buyers. Let them know that their purchase could make their life easier or provide a solution to their problem. Your pricing strategy should also be included here, so buyers know what they’re paying for.
5. Optimize For SEO
Make sure that your product descriptions are optimized for search engines. You can do this by including keyword-rich content, properly formatting the text, and providing internal and external links where appropriate. Your product ID, brand name, and other relevant details should also be included.
6. Make It Mobile-Friendly
With the increasing popularity of mobile devices, make sure that your product descriptions are optimized for viewing on phones and tablets. This includes using shorter paragraphs, larger font sizes, and simpler language that is easier to digest on a small device.
By taking the time to optimize your product descriptions, you can ensure that your products stand out and attract more potential buyers. With the right combination of words, you can create descriptions that are both informative and entertaining, helping to drive sales and increase conversions.
Conclusion
Adding products manually to Amazon is a great way to make sure that your products stand out and increase your sales. It takes some effort and patience, but it can be rewarding in the end. With the help of this guide, you should have a better understanding of how to add products to Amazon manually and make sure that your products are listed properly.
Take the necessary steps to make sure that your product is ready for sale and start making money with Amazon today. But don’t forget to read the guidelines and terms of service carefully so that you don’t run into any issues.
Be sure to check out our other e-commerce guides.

